BREAKING NEWS NEW
SUPPLY AND DEMAND PRECISE ENTRIES REVEALED

TOTALLY UNIQUE AND PROVEN WAY TO USE SUPPLY AND DEMAND FOR PRECISE ENTRIES, GUARANTEED!

Without wasting hours watching videos on YouTube or searching for the Holy Grail.

“

I finally got funded after 1 year of trying, without Jonathan sharing his knowledge I might be still trying.

Veneziani

Does This Sound Painfully, Uncomfortably Familiar?

✕ You understand the basics of trading. You could probably recite the textbook definitions in your sleep. And yet you still stare at your charts like they're written in a language you almost, but don't quite, speak.
✕ You can spot support and resistance fine — but the second someone says "quality Supply & Demand zone," your confidence quietly leaves the room and doesn't say goodbye.
✕ You find a zone that looks good. Genuinely good. Then the doubt creeps in: is this fresh? Has it been tested to death already? Or is it just a pretty rectangle you're about to lose money to?
✕ You know roughly where you want to trade — which, unfortunately, is a bit like knowing roughly which exit to take on the motorway. You either jump off way too early or miss it completely and end up somewhere you didn't plan to be.
✕ You've tried strategy after strategy, setup after setup, and your results still feel like they're being decided by a coin flip wearing a trading journal as a disguise.
✕ You're tired of watching perfect trades run without you, arms crossed, judging you from a distance — or worse, entering one and watching price immediately do a full 180 like it somehow knew your entry price specifically.

From "Is This Zone Even Good?" To A Process That Actually Answers That

Dear trader,

I used to stare at supply and demand zones the way most people stare at abstract art.

Nodding.

Pretending to get it.

Secretly having absolutely no idea what I was looking at.

Except I wasn't in a gallery.

I had real money sitting on the line.

About to enter a trade based on a rectangle I'd drawn with roughly the same conviction as picking a lottery number.

I'd found "a zone."

Looked decent.

Price had reacted there once, allegedly, three weeks ago, maybe.

Fresh? No idea.

Tested to death already? Also no idea.

Worth trading? I was about to find out. The expensive way.

Ohmygawd.

And here's the bit that actually bothered me —

Every trader I taught could draw a zone.

Ask them to mark support and resistance on a static chart?

Flawless.

Point at old reaction areas and say "price bounced there"?

Nailed it, every time.

Ask the same person to actually pull the trigger on a live zone, with real money attached?

Total paralysis.

Not because they didn't know what supply and demand was.

Because "I can see a zone" and "I know if this zone is actually worth trading" are two completely different skills wearing the same trendline tool.

I thought it was my teaching.

So I taught harder.

More examples.

More "see this zone here, see how it reacted" until I'd said the word "zone" so many times it stopped sounding like a real word.

Didn't matter.

Two traders. Same chart. Same zones marked out identically.

One took the trade confidently.

The other hesitated, missed the entry, then watched it run without them — like a bus pulling away while they were still fumbling for change.

Knowing wasn't the problem.

Deciding was.
Then I Actually Broke Down What Was Going Wrong

And it was uncomfortable.

I watched trader after trader find a genuinely good zone.

Then either freeze completely.

Or enter so early they got chewed up before price even confirmed anything.

Or enter so late they were basically buying the top of the move — like a man arriving to a party right as everyone's leaving.

Same zone.

Wildly different outcomes.

All because nobody had ever taught them what actually made a zone tradable versus just... present.

That's when it clicked:

Drawing a zone was never the hard part. Qualifying it was.

So I asked the question that actually mattered.

What if there was a process — not vibes, not "this looks about right" — for working out whether a zone was fresh, whether it'd already been tested into oblivion, and exactly where the entry should sit inside it?

I Built It. Called It The Profit Per Trade Workshop

Took everything I'd learned from years of trading, analysing charts, and watching traders freeze at the worst possible moment.

Turned it into one structured process.

Read the chart → Identify supply and demand → Qualify the zone → Plan the entry → Manage the trade.

Gave it to traders who'd been drawing "decent looking" zones for months.

Still hesitating every single time price got close.

Within days, they weren't just finding zones anymore.

They were filtering out the bad ones before wasting a single second on them.

And actually pulling the trigger on the good ones, with a reason behind it, instead of a shrug and a prayer.

One trader told me he used to sit there frozen every time price approached a zone. Completely unsure if it was "the one."

Now he knows almost instantly whether it's worth his attention at all.

Another said she used to second-guess every single zone — "is this actually good, or am I just hoping it is?" — and that voice in her head basically went quiet.

Cue angels singing.

But Here's What I Didn't Expect

Once the guesswork disappeared, something else showed up:

Actual selectivity.

Traders stopped treating every zone on the chart like a potential trade.

They started ignoring 80% of what they used to obsess over — because the process itself told them which 20% actually deserved attention.

Read the chart → Qualify the zone → Plan the entry.

Not "stare at everything and hope something jumps out."

Let's be clear about what this workshop is not, because someone always asks:

It is NOT a signal service telling you which zones to trade like a fortune cookie with a Wi-Fi connection.

It is NOT every advanced concept in my entire trading system crammed into one workshop.

It is NOT another pile of setups to memorise and forget by next Tuesday.

It's the exact supply and demand foundation and entry process I teach.

The one that turns "that zone looks kind of okay I guess" into an actual decision you can stand behind.

This Is The Foundation Behind The Workshop

Same principles I'd walk you through zone by zone, live, on a call.

Now built into a structured process — so you're not relying on gut feeling every time price approaches a level.

Understand supply and demand.

Learn to spot the difference between a zone that's just sitting there and one actually worth your attention.

Qualify your entries.

Build a plan you can actually repeat.

You don't need more charts to stare blankly at.

You need to know which zones matter — and exactly how to approach them when it's time to trade.

Let me show you exactly what's inside.

GET WORKSHOP ACCESS

Most Trading Education Teaches You To Find Setups. The Profit Per Trade Workshop Teaches You To Actually Trade Them.

But a zone you can spot and still can't pull the trigger on is just an expensive piece of wallpaper.

You need to know why it matters.

Use it inside an actual process.

Not just get told "this is a demand zone, good luck."

That's why the Profit Per Trade Workshop isn't just "here's what a zone looks like" — it's the foundation, the qualifying process, and the entry method, so you can actually use this like a trader.

Not just stare at rectangles wondering if today's the day one of them finally makes sense.

Inside The Profit Per Trade Workshop You Get:

  • ✅ Your Supply & Demand Foundation — Not Guesswork Dressed Up As Analysis
    Learn to identify and understand supply and demand zones using market structure as the base — so you know what actually makes a zone significant, instead of drawing a box because "it looked kind of reaction-y there."
  • ✅ A Way To Qualify Zones — Before You Waste A Second On A Bad One
    Not every zone deserves your attention, let alone your money. Learn to tell fresh from tested, understand how each behaves, and stop treating every rectangle on your chart like it's equally worth trading.
  • ✅ An Entry Process, Not A Coin Flip With Extra Steps
    This is where analysis actually becomes a trade. Learn the set-and-forget entry and the confirmation entry, and structure your entry around the zone itself — instead of entering the second your patience runs out.
  • ✅ A Trade Plan That Doesn't Fall Apart The Moment You're In
    Top-down analysis, zone identification, entry, risk management, targets, trade management — all working together, not scattered across six different habits you've half-adopted from six different YouTube videos.

Put simply: this isn't more information to memorise and forget by Thursday.

It's a foundation and a process for turning "I think this might be a zone" into an actual trade you can stand behind.

You'll learn the foundation.

You'll learn to qualify it.

You'll learn to enter it.

You'll learn to manage it once you're in.

This is the groundwork you need before stepping into the more advanced market-structure and execution framework taught inside the 90-Day Profit Trading System.

GET WORKSHOP ACCESS
“

I've been backtesting your supply and demand and it's so powerful, your lessons are great short and clear.

RedDog

The Four-Part Process Behind The Profit Per Trade Workshop

Understand the zone.
Read the context.
Qualify the entry.
Execute with an actual plan — not a shrug and a prayer.
01

Build Your Supply & Demand Foundation

Start with the core principles.

Not the "trust me, it's a zone" version. The actual mechanics.

You'll learn to read the structure surrounding your zones, spot the areas that genuinely matter, and — just as important — start ignoring the ones that don't.

Because not every rectangle on your chart deserves a second glance, however tempting it looks.

02

Identify Fresh & Tested Zones

Not every zone deserves a trade.

Some of them have been picked apart by price so many times they've got nothing left to give — like a teabag that's been dunked four times already.

You'll learn to tell fresh from tested, understand how previous reactions change a zone's odds, and build a consistent way of spotting the ones actually worth your attention.

03

Analyse The Market From The Top Down

Your entry chart doesn't exist on an island.

Stop treating it like it does.

You'll learn to work through multiple timeframes before you go anywhere near an entry — building an actual top-down view of the market, so your zones make sense inside the bigger picture instead of floating around in isolation, hoping for the best.

04

Turn The Analysis Into A Trade Plan

Zone identified. Zone qualified.

Now what?

This is where most traders freeze — staring at a good zone with absolutely no idea what to actually do about it.

You'll learn the entry criteria, how to pinpoint your entry precisely, how to structure risk and reward properly, and how to manage the trade through a process you can repeat every single time — not reinvent from scratch under pressure.

The result?

You stop just spotting zones and calling it analysis.

You start understanding which ones actually matter, exactly where the entry comes from, and how to build a real trade around it — instead of hoping conviction shows up right as price does.

That's the entire point of the Profit Per Trade Workshop.

“

I got funded today thanks to your profits per trade workshop. Your course gave me that extra push I needed to reach my target.

Joe Midas

Exactly How The Profit Per Trade Workshop Will Help You Build Your Supply & Demand Foundation And Find Better Entries

The Profit Per Trade Workshop gives you the foundational supply & demand framework I teach for moving from simply identifying zones to understanding which zones matter, how to analyse them and where the trade actually comes from.

01 · PROFIT PER TRADE WORKSHOP

Build Your Supply & Demand Foundation

Learn the core process for analysing supply and demand, qualifying potential entry zones and turning your analysis into a structured trade plan.

Profit Per Trade Workshop
Inside the Workshop, you’ll learn how to:
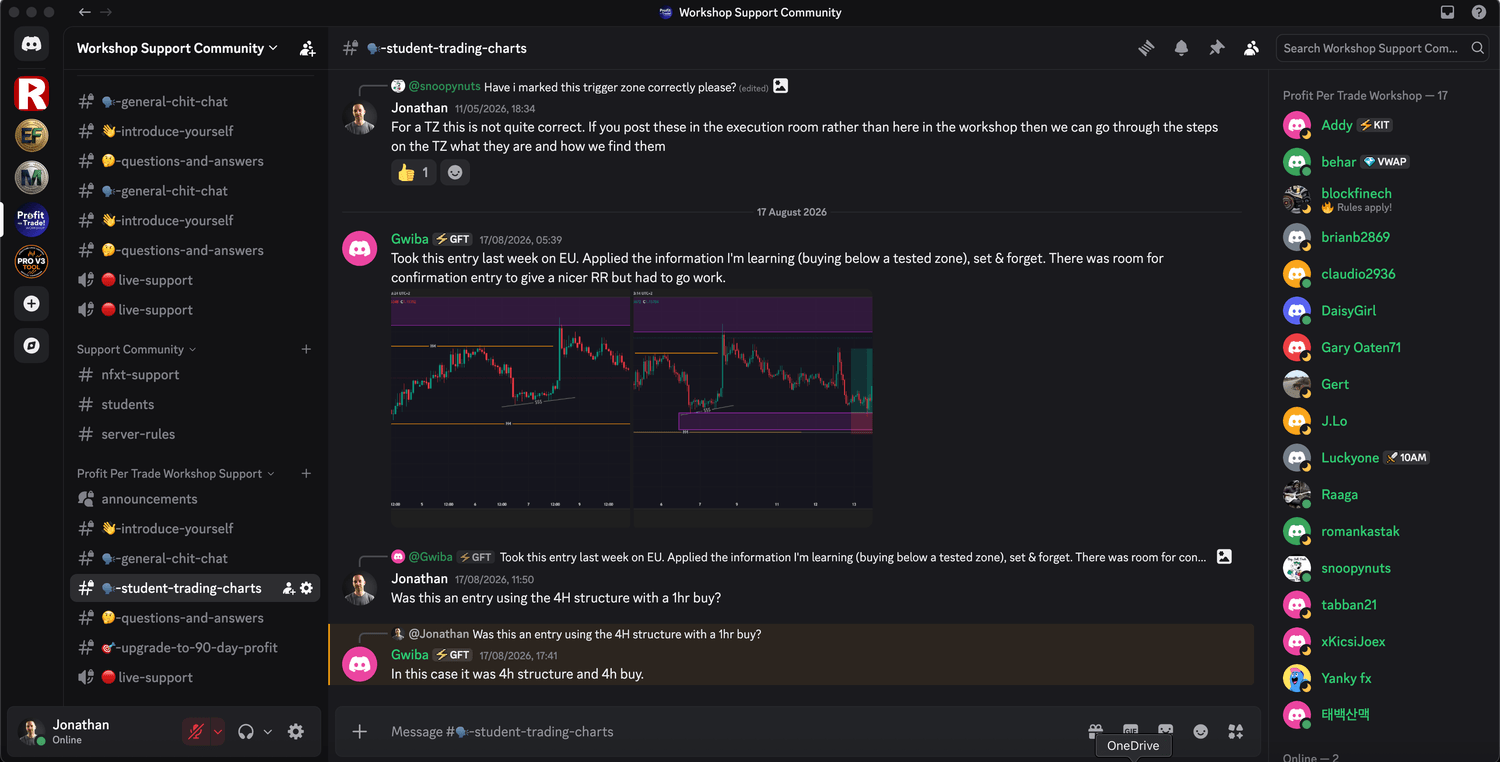
  • Understand the foundations of supply & demand.
  • Identify fresh and tested supply & demand zones.
  • Use top-down analysis to understand the wider market context.
  • Apply clear criteria to qualify potential entry zones.
  • Pinpoint where and why an entry should be taken.
  • Structure your risk, reward and trade management.
  • Study real trade examples from entry through to exit.
  • Build a clear trade plan you can follow.

You’re not simply learning what a supply or demand zone looks like.

You’re learning the process for analysing the zone, qualifying the opportunity and building the trade around it.

“

“Just read through all Jonathan's course and I'm well impressed how the course was conducted”

Colin

02 · TRADING SUPPORT & APPLICATION

Put What You Learn Into Practice

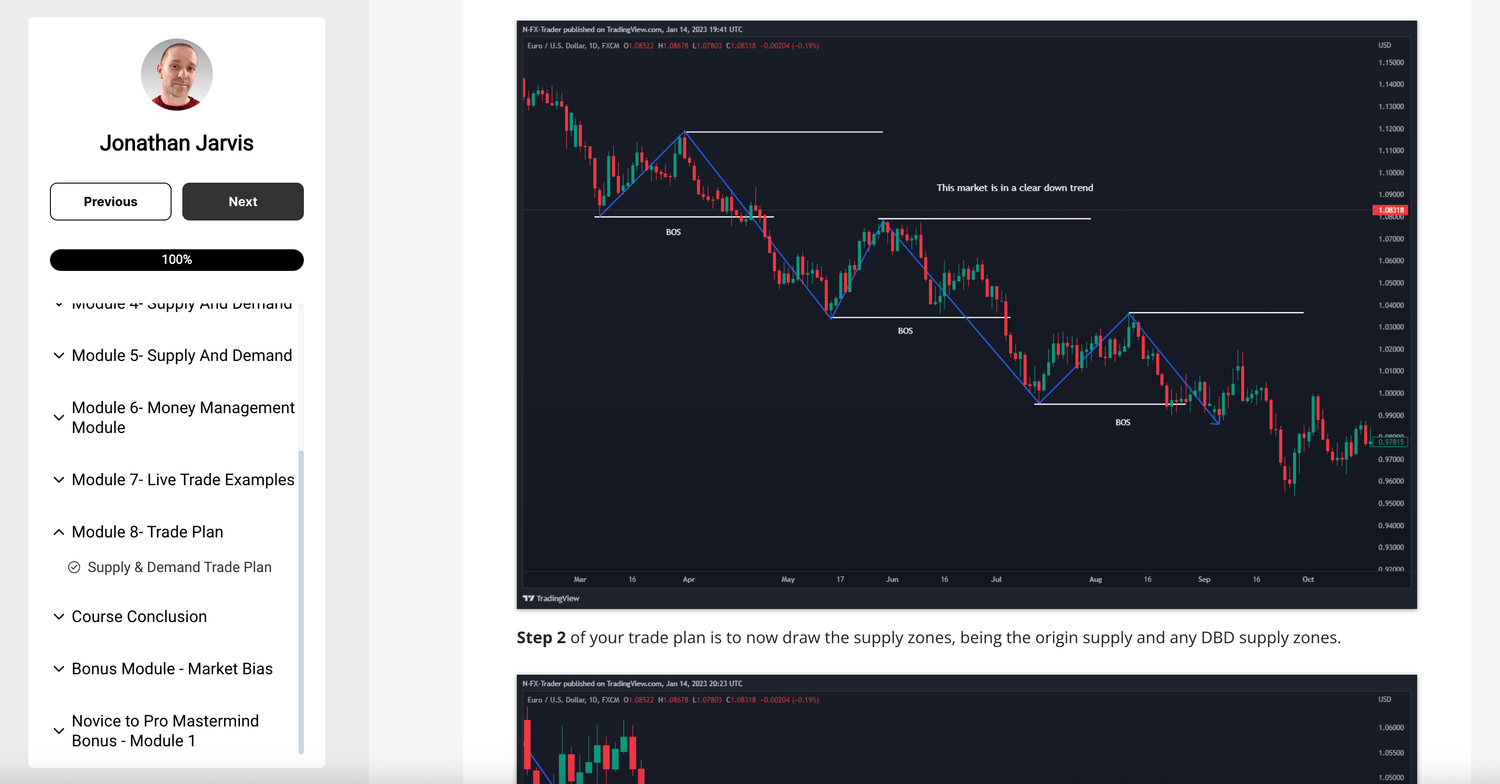
Learning the foundations is only the beginning. The Workshop gives you the framework to take what you learn and start applying it to real market analysis and trade planning.

Trading Support & Application
Inside the Workshop, you’ll be able to:
  • Apply the supply & demand process to real charts.
  • Work through the analysis from top down to entry.
  • Ask questions when you’re unsure about a concept.
  • Study real trade examples from entry through to exit.
  • Develop a clearer process for qualifying potential trades.
  • Build confidence in your own analysis through practice.

The goal isn’t to follow someone else’s trades.

It’s to develop the ability to analyse your own charts, identify your own opportunities and build your own trades using the process you’ve learned.

“

“Hi Jonathan, now at module 4... just want to tell you congrats for explaining everything very clear. Thanks for this!”

Cedric

03 · TRADE WITH A CLEAR, REPEATABLE PROCESS

Turn Supply & Demand Analysis Into A Clear Trade Plan

Knowing how to identify a supply or demand zone is only the beginning.

The goal is to turn that analysis into a clear process you can follow when it’s time to trade.

Turn Supply & Demand Analysis Into A Clear Trade Plan
You’ll learn how to:
  • Identify potential trading opportunities using supply & demand.
  • Build a clear plan before entering a trade.
  • Qualify your entry zone using defined criteria.
  • Pinpoint your entry and define your risk.
  • Establish your risk-to-reward before taking the trade.
  • Manage the trade according to your plan.
  • Review your trades and learn from your decisions.

The aim is to replace guesswork and impulsive decisions with a structured supply & demand process you can repeat.

“

“I've been locked in, and half way through the workshop. I was able to catch EU for 68 pips. Thank you my friend.”

JustBp

04 · DEVELOP THE SKILL THROUGH REAL APPLICATION

Keep Practising Until The Process Becomes Second Nature

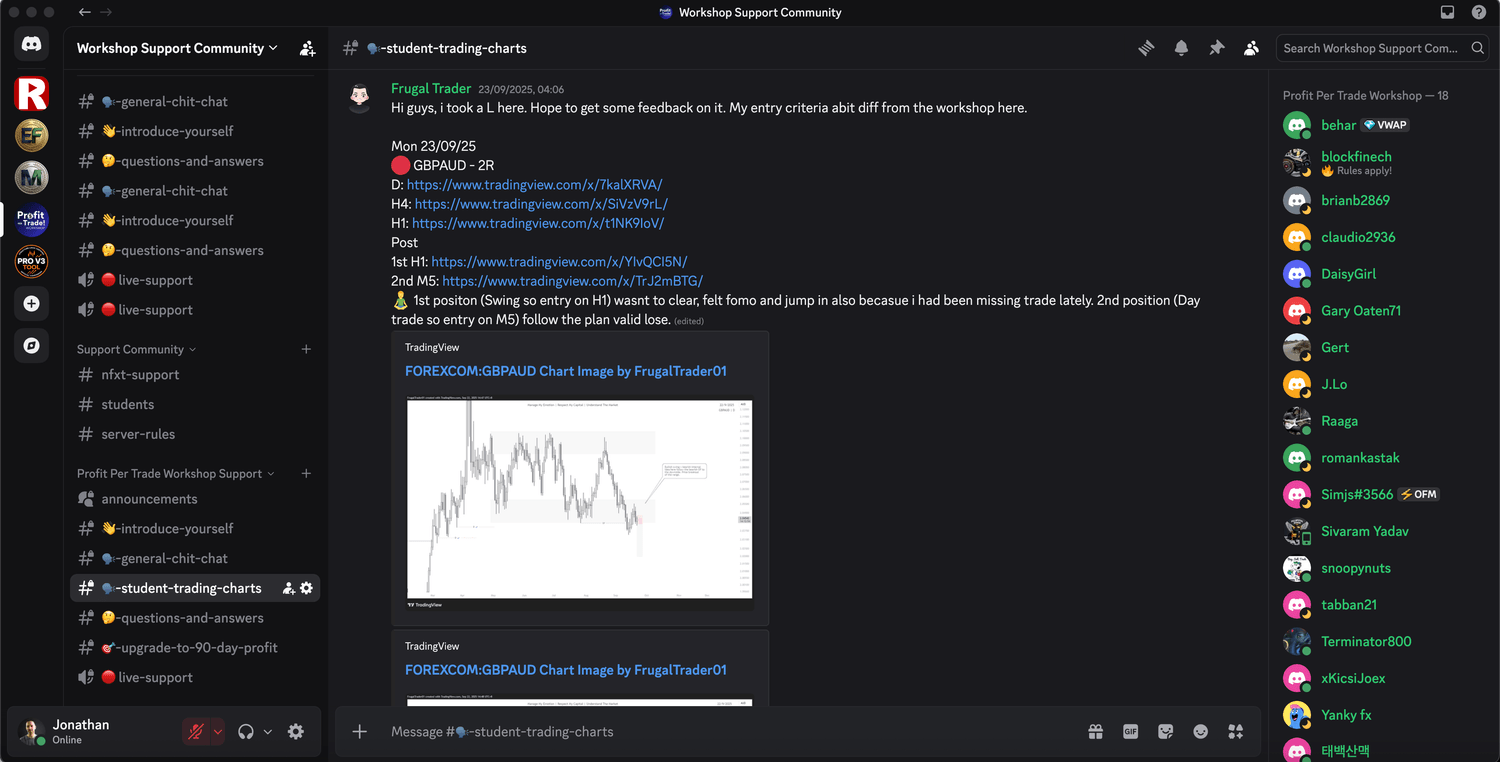
Becoming better at analysing supply and demand doesn’t happen from watching more lessons. It comes from applying what you learn, reviewing your decisions and learning from the process.

Develop The Skill Through Real Application
Inside the Workshop, you’ll continue to:
  • Review your trades and identify where you can improve.
  • Recognise recurring mistakes in your analysis and entries.
  • Refine your ability to qualify supply & demand zones.
  • Practise the process across different market conditions.
  • Learn from real trade examples and see how the process is applied.
  • Build greater confidence through experience rather than guesswork.

The more you apply the process, the clearer your decisions become — until analysing a potential supply & demand trade becomes a structured skill rather than something you have to constantly second-guess.

“

“I am now on module 7 with live executions. I struggled with multiple timeframe analysis before I met you but your bite sized teaching keeping things so simple OMG! Thanks a million.”

Obsidian

Profit Per Trade Workshop Reviews

See Why Traders Choose The Workshop

Real feedback from traders on the Supply & Demand training, entry framework, trade planning, support and practical application.

INCLUDED BONUSES

Included Bonus #1: Market Bias Strategy

Because finding a perfect zone and then trading against the actual direction of the market is a special kind of self-sabotage.

Get the Market Bias Strategy thrown in completely free when you grab the Profit Per Trade Workshop — no upsell, no "just add this for £27," none of that.

This hands you a way to work out which direction you should even be looking before you go hunting for a zone — so you're not qualifying a beautiful demand zone sitting directly in the path of a freight train going the other way.

Your bonus includes:
  • The Market Bias Strategy itself — the actual process, not a vague "just get a feel for it" gesture.
  • A repeatable way to establish market direction, instead of eyeballing a chart and calling it "gut instinct."
  • How to use higher-timeframe context to form that bias — so you're reading the room before you walk into it.
  • How to layer your bias alongside your supply and demand analysis, so the two actually work together instead of quietly contradicting each other.
  • Real context for your trade planning — not just "this zone looks nice," but "this zone looks nice AND the market agrees with me."
Included Bonus #2: Novice To Pro Mastermind — Module 1

You'll also get Module 1 of the Novice To Pro Mastermind, completely free.

This gives you a proper introduction to the market-structure concepts sitting underneath the more advanced framework taught inside the full Mastermind — so you're not walking into Module 2 completely blind, wondering what everyone's talking about.

Your bonus includes:
  • Novice To Pro Mastermind — Module 1, no watered-down preview version.
  • An introduction to the market-structure concepts used throughout the wider framework — the actual foundation, not a highlight reel.
  • How price structure can be used to read market context — the skill that turns "I see candles" into "I understand what the candles are doing."
  • A genuine look at where your market-structure knowledge can go next, once the Workshop's given you the entry process to go with it.

Here's the split, plain and simple:

The Workshop gives you the Supply & Demand foundation and entry process.

The Market Bias Strategy tells you which direction you should even be looking in.

Mastermind Module 1 shows you where all of this leads once you're ready to go further.

Three pieces. One process. Zero extra cost.

Bonus Value

Market Bias Strategy — Included FREE with your Workshop purchase.
Novice To Pro Mastermind — Module 1 — Included FREE with your Workshop purchase.

STOP GUESSING. START TRADING. TODAY.

Get The Complete Profit Per Trade Workshop

£149 £99 — One-Time Payment

SAVE £50 (before your brain finds a reason to "think about it")

September Special: £99 until October 31st. After that it goes back to £149, and no amount of "just this once?" emails will change that.

This is the complete workshop, the community, and two genuinely useful bonuses. Not a taster designed to sell you the real thing later.

Your purchase includes:

Profit Per Trade Workshop

Full access to the complete training — supply and demand foundations, fresh versus tested zones, top-down analysis, entry criteria, qualifying your zones, money management, real trade examples, and a full trade plan. Not scattered lessons. One process, start to finish.

Supportive Trading Community

Somewhere to actually ask "wait, is this a fresh zone or not?" instead of guessing alone at your desk and hoping for the best. Discuss what you're learning, get help applying it to your own charts, and stop making decisions in a vacuum.

Market Bias Strategy (Included, Free)

So you're not qualifying a gorgeous demand zone sitting directly in the path of a market that's clearly going the other way. Direction first, zone second.

Novice To Pro Mastermind — Module 1 (Included, Free)

A proper introduction to the market-structure concepts sitting underneath everything you're learning here — so you're not walking into more advanced training completely blind later.

Inside Your Profit Per Trade Workshop:

  • ✓ Supply & Demand Foundations
  • ✓ Fresh & Tested Zones
  • ✓ Top-Down Analysis
  • ✓ Trade Entry Criteria
  • ✓ Qualifying Entry Zones
  • ✓ Money Management
  • ✓ Real Trade Examples
  • ✓ Complete Trade Plan

Included Bonuses:

  • ✓ Market Bias Strategy
  • ✓ Novice To Pro Mastermind — Module 1

Learn the foundations. Establish your bias. Qualify the opportunity. Build the trade with an actual process — not a shrug and a prayer.

GET PROFIT PER TRADE WORKSHOP ACCESS

Immediate access · One-time payment · October price

Build The Foundation You've Been Skipping Past

The Profit Per Trade Workshop is for traders who understand some of the basics — support, resistance, the general idea of supply and demand — but still freeze the moment it's time to actually plan and take a trade.

You know enough to be dangerous. Not quite enough to be consistent.

Inside, you'll learn the actual process: analysing the market properly, identifying and qualifying zones instead of guessing at them, establishing your bias so you're not fighting the market's direction, planning your entry, and managing the trade once you're in — with a community around you so you're not doing any of this alone at your desk, second-guessing every click.

You'll also get:

• Market Bias Strategy — included free
• Novice To Pro Mastermind — Module 1 — included free

The complete Workshop is currently £99, one-time payment.

If you're done bouncing between strategies hoping one of them finally clicks, and you actually want a structured foundation you can put on your own charts today — this is where you start.

GET WORKSHOP ACCESS
“

“Thanks to you coach, it's been next level since joining here.”

Tez

The Profit Per Trade Workshop Is For Traders Building A Real Foundation — Not Chasing The Next Shiny Setup

The Profit Per Trade Workshop Is For You If...

Doesn't matter if you're brand new or you've been staring at charts for years. What matters is you're serious about building a real foundation, instead of collecting strategies like trading cards.

  • You want to understand supply and demand — not outsource your brain to an indicator or some guy in Telegram with a Lambo he doesn't own.
  • You want a real process for identifying and qualifying zones — not "draw a box and hope for the best."
  • You want to know how fresh and tested zones differ, so you stop treating every rectangle like it's equally worth your money.
  • You want to learn top-down analysis, so your entries make sense inside the bigger picture instead of floating in isolation.
  • You want a clear process for deciding where, why and how to enter — not a coin flip dressed up as conviction.

The Profit Per Trade Workshop Is NOT For You If...

  • You want guaranteed profits or someone pinging you exactly when to buy and sell. That doesn't exist. Anyone selling it is selling fiction.
  • You expect one workshop to make you profitable without practising, reviewing, and putting the work in yourself.
  • You want an advanced market-structure or execution system — that's the 90-Day Profit Trading System, not this.
  • You want a shortcut or "magic strategy" that skips understanding what's actually happening on the chart.
  • You're not willing to manage your own risk and own your decisions. This gives you the process, not the excuse.

Doesn't matter how experienced you are either. What matters is you're chasing certainty instead of a foundation, and hoping £99 alone does the heavy lifting.

INSIDE THE PROFIT PER TRADE WORKSHOP

The Complete Supply & Demand & Trade Entry Curriculum

Full access to the complete 6.5-hour Workshop, covering the foundational Supply & Demand principles, zone analysis, top-down analysis, trade entry criteria, risk management and trade planning I teach.

Module 1: Market Structure Plan

Understand the foundational structure concepts needed to identify meaningful Supply & Demand areas and map them correctly.

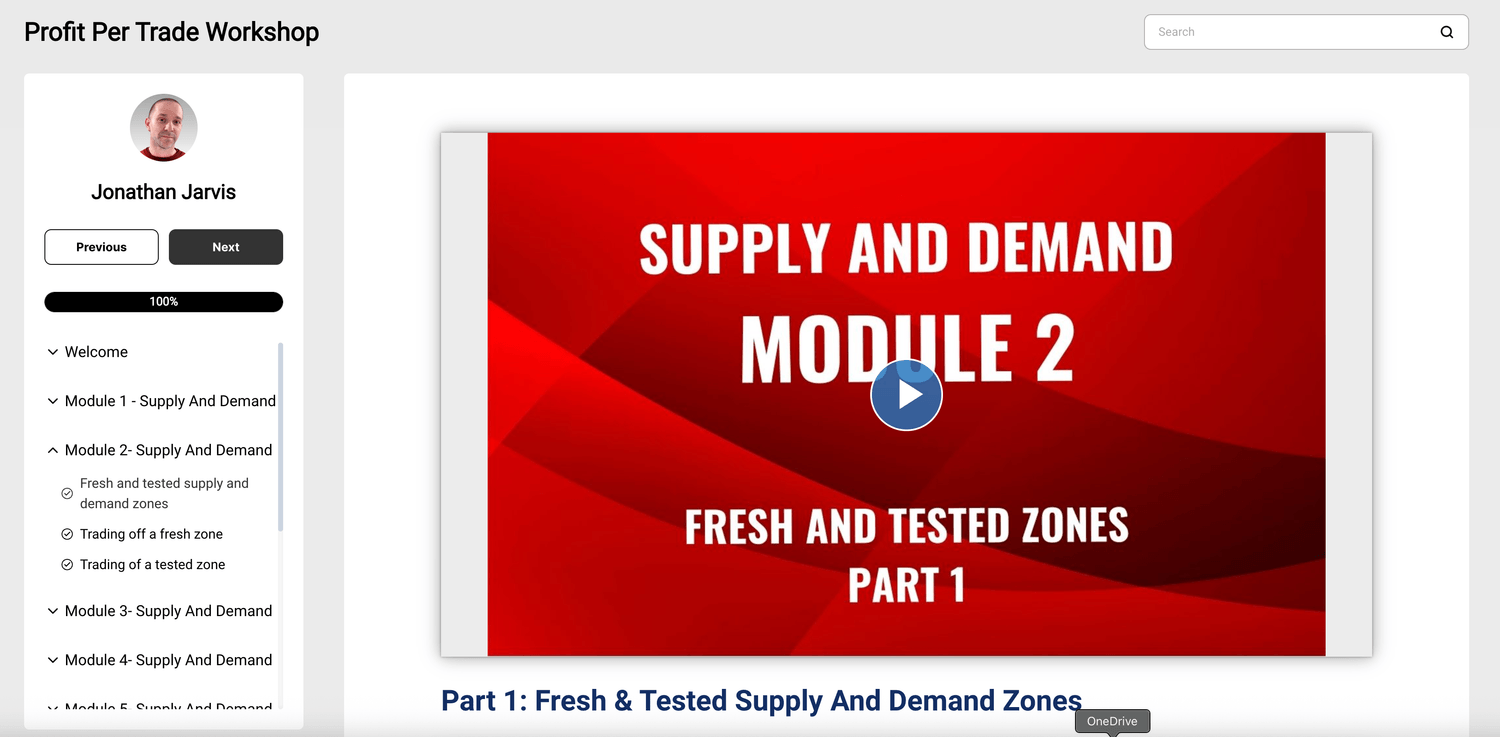
Module 2: Fresh & Tested Zones

Learn how to identify fresh and tested Supply & Demand zones and understand how previous price interaction affects the quality of a zone.

Module 3: Top-Down Analysis

Learn how to analyse multiple timeframes and build the wider market context before looking for an entry.

Module 4: Trade Entry Criteria

Understand the criteria for entering a trade and learn both set-and-forget and confirmation-based approaches.

Module 5: Qualifying Entry Zones

Learn how to qualify potential zones, pinpoint your entry and structure the trade around the available risk-to-reward.

Module 6: Money Management

Learn how to structure your risk, manage your position and approach profit targets and exits with a defined plan.

Module 7: Real Trade Examples

See the process applied to real trades, from identifying the opportunity through entry, management and exit.

Module 8: Your Trade Plan

Bring the complete process together into a clear trading plan you can use when analysing and planning your own trades.

EVERYTHING YOU NEED TO KNOW BEFORE JOINING THE PROFIT PER TRADE WORKSHOP

What exactly is the Profit Per Trade Workshop?

The Profit Per Trade Workshop is a 6.5-hour training programme focused on the foundational Supply & Demand and trade-entry process I teach.

You’ll learn how to identify fresh and tested zones, analyse the market from top down, qualify potential entry zones, structure your risk and build a clear trade plan.

The goal is to give you a structured foundation for turning Supply & Demand analysis into an actual trade plan rather than simply identifying zones on a chart.

Is this suitable if I’m still a beginner?

Yes. The Workshop is designed to teach the foundational Supply & Demand and entry concepts step by step.

You don’t need to already be an expert in Supply & Demand to start.

What you do need is a willingness to learn, practise and apply the process yourself.

What will I actually learn?

You’ll learn how to:

  • Understand the foundations of Supply & Demand
  • Identify fresh and tested Supply & Demand zones
  • Analyse the market from top down
  • Apply clear trade-entry criteria
  • Qualify potential entry zones
  • Pinpoint your entry and define your risk
  • Structure your risk-to-reward
  • Study real trade examples
  • Build a clear and structured trade plan
What is the supportive trading community?

The Workshop includes access to a supportive trading community where you can discuss what you’re learning and ask questions about the training.

It gives you somewhere to continue applying the concepts from the Workshop, share your learning and get help when you’re unsure about something.

It isn’t a signal service where you simply follow someone else’s trades.

Do I get access to the full Workshop?

Yes. Your purchase gives you full access to the complete Profit Per Trade Workshop and all of the training included with your purchase.

What bonuses are included?

Your Workshop purchase includes two bonuses:

  • Market Bias Strategy — a strategy for establishing your market direction and adding context to your Supply & Demand analysis.
  • Novice to Pro Mastermind — Module 1 — an introduction to the market-structure concepts taught within the wider Mastermind.
Do you provide trade signals?

No.

This isn’t a signal service. The objective is to teach you how to analyse Supply & Demand and make your own trading decisions using the process.

Does the Workshop work for different trading styles?

The Supply & Demand process is not tied to one specific trading style or timeframe.

The concepts can be applied across different markets and timeframes. Your own trading style, timeframe and risk management will determine how you apply the process.

How long does it take to become profitable?

There is no guaranteed timeframe for becoming profitable.

Trading is a skill, and the time it takes to develop that skill varies from person to person. The Workshop gives you the training and process to develop your understanding, but your results depend on how you learn, practise, execute and manage your risk.

Is this a signals or copy-trading service?

No.

You are learning a Supply & Demand and trade-entry process, not paying someone to trade for you.

You remain responsible for your own trading decisions and risk.

Is there a money-back guarantee?

No. All sales are final.

Please make sure you fully understand what is included before purchasing.

How long do I have to complete the Workshop?

There is no requirement to complete the Workshop within a fixed timeframe.

You can work through the training at your own pace and return to the material as you continue practising and applying what you learn.

How do I get access after purchasing?

You’ll receive instructions to access the Profit Per Trade Workshop and the supportive trading community after your purchase.

You can then begin working through the training and applying the process to your own charts.

Is this financial advice?

No.

The Profit Per Trade Workshop is an educational programme. Nothing inside the Workshop constitutes personalised financial or investment advice, and you are responsible for your own trading decisions and risk.

Can't I Just Figure This Out Myself?

Honestly? Yes.

You can spend years staring at charts.

Testing approaches that half-work, then quietly abandoning them.

Trying to piece supply and demand together like a jigsaw with half the pieces missing and no picture on the box.

Working out which zones matter, where to enter, and how to build a repeatable plan — through trial, error, and a fair bit of expensive error.

I did exactly that.

Years of it.

The Profit Per Trade Workshop is what came out the other side — thousands of charts analysed, years spent teaching traders until I could explain "is this zone actually good" in my sleep.

Instead of piecing it together blind, you start with the whole process already laid out.

You'll know exactly what to study.

What to actually look for on your own charts.

How to qualify your zones instead of guessing.

How to establish your bias before you even go looking for an entry.

And how to turn your analysis into a real, structured trade plan.

Best part?

You're not doing this completely alone.

Inside the supportive trading community, you can ask the questions you'd otherwise sit on for a week. Discuss what you're learning. Get help applying it to your own charts instead of guessing in isolation and hoping you got it right.

Here's the honest bit:

The Workshop won't trade for you.

You still have to learn. Still have to practise. Still have to make the call and pull the trigger yourself.

But if you're actually serious about building a proper Supply & Demand foundation and trading with an actual process instead of a hunch — you don't need years to reinvent this from scratch.

You can start with the training, the process, the community, and the bonuses already built and battle-tested.